




Ford Transit Build Guide
All 19 phases of a Transit conversion, in the order we build them in our Loveland shop, with the parts each phase calls for.
The build sequence
From empty shell to finished rig.
Every Ford Transit conversion runs the same order of operations. Get the sequence wrong and you insulate before you cut windows, or run wire after the walls go up. This is the order we build them in our Loveland shop, with the parts each phase calls for.
- 01 Order Your Van Weeks to months · Before anything
- 02 Plan & Measure 1–2 weeks · Before anything 3 parts
- 03 Strip & Prep 1–2 days · Before insulation 1 part
- 04 Cut Openings 1–3 days · Before insulation 3 parts
- 05 Fan and Air Conditioning 1–2 days · After openings, before insulation
- 06 Sound Deadening 4–8 hours · Before insulation 1 part
- 07 Subfloor & Flooring 1–2 days · Before walls 9 parts
- 08 Insulation 2–4 days · After openings 2 parts
- 09 Electrical Rough-In 3–6 days · With insulation, before walls 2 parts
- 10 Furring & Framing 1–2 days · Before walls 5 parts
- 11 Trim & Upholstery 1–2 days · Before walls 7 parts
- 12 Walls & Ceiling 1–3 days · After all rough-in 15 parts
- 13 Take a Rest Phase Optional break 5 parts
- 14 Cabinetry & Build-Out 2–4 weeks · After walls 11 parts
- 15 Power System 2–4 days · After cabinetry 3 parts
- 16 Plumbing Rough-In 2–4 days · After cabinetry 5 parts
- 17 Heating 1–2 days · Before walls 2 parts
- 18 Finishing 2–5 days · Last 5 parts
- 19 Exterior 1–3 days · Last 1 part
Order Your Van
The build starts at the order sheet. Wheelbase, roof height and a handful of factory options decide what you can build later, and most of them can't be added after the van leaves the factory. Spend the time here — it's the cheapest phase to change your mind in.


Order the van for the build, not for the lot. Factory windows land where they land, and a window where your galley should go means redesigning around it or cutting it out. Spec the glass, the electrical prep and the seating up front — and if you can't wait for an order, check the window sticker against your floor plan before you sign.
-
Pick the wheelbase and roof height from your floor plan, not the other way round.
ToolsTape, floor plan -
Decide on the drivetrain. AWD costs payload and height but buys you access.
-
Choose the window layout around where your bed, galley and seating will go.
-
Add the factory electrical prep — upfitter switches, a second battery and a high-output alternator where offered.
-
Check payload on the actual spec before ordering. Every option eats into it.
-
Order your paper patterns while you wait, so the layout is settled when the van arrives.
ToolsPatterns
Plan & Measure
Nothing gets cut until the layout is settled on paper. Tape the floor plan out full size, sit in it, and move things until the walkway and the bed both work. Every hour here saves a day later.


Weight and axle load are the two numbers people skip. A high-roof 148 has real payload limits, and water plus batteries plus gear eats them fast. Budget mass by phase, not at the end.
-
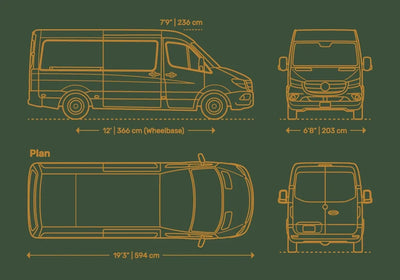
Measure your actual van. Wheelbase, roof height, and body trim vary — confirm before ordering anything cut to size.
ToolsTape, notepad -
Chalk or tape the full layout onto the cargo floor. Bed, galley, seating, door swings, and the walking aisle.
ToolsPainter's tape, chalk line -
Sit in it. Lie down where the bed goes. Open the slider and check nothing blocks it.
-
Lock in window and fan locations now — they drive the framing and the wall kit cuts.
ToolsMarker, straightedge -
Build a weight budget: water, batteries, cabinets, gear, people. Compare against your payload sticker.
-
Order paper patterns so you can test-fit shapes before committing material.
ToolsPatterns
- Option Ford Transit Paper Patterns: Floors$225.00
- Option Ford Transit Paper Patterns: Walls and Ceiling$180.00
- Option Ford Transit Pill Window Cut Template Paper Pattern$89.00
Strip & Prep
Factory liner, cargo flooring, and the plastic trim all come out. You want bare metal, clean and dry, with every threaded hole in the body mapped — those captive nuts are free mounting points later.


Don't bin the factory hardware. The bolts holding the cargo floor and the D-ring anchors are the correct thread pitch for reuse, and Ford charges real money to replace them.
-
Pull the cargo floor, wall liners, and any factory shelving. Work back to front.
ToolsSocket set, trim tools -
Remove plastic trim panels and set the fasteners aside in labelled bags.
ToolsTrim removal tools -
Vacuum and degrease every surface. Insulation and adhesive won't stick to shipping wax.
ToolsShop vac, degreaser -
Treat any surface rust or bare scratches now — you will never see this metal again.
ToolsWire wheel, primer -
Photograph and mark every factory threaded hole. Those become your no-drill mounting points.
- Amazon Strip and prep tools — our Amazon shopTrim removal tools, socket set, shop vac, degreaser and wire wheels — the kit we reach for on every teardown. Off-site
Cut Openings
Windows, roof fan, and any wall or floor penetrations get cut while the shell is empty and you can reach both sides of the metal. This is the phase people put off, and putting it off is what forces them to tear insulation back out.


Cut once. Measure from a body seam, not from a panel edge — Transit panel edges are not square to the world. Deburr and prime every cut edge before the glass or flange goes in, or you'll be chasing rust in two winters.
-
Mark openings from a fixed body reference, then check diagonals before you cut.
ToolsTemplate, marker, square -
Drill relief holes at the corners, then cut with a jigsaw and fine metal blade.
ToolsJigsaw, metal blades, drill -
Deburr, prime, and seal every cut edge. Let it cure.
ToolsFile, self-etch primer -
Set windows per the manufacturer's method — bonded or clamp-ring — and support them until cure.
ToolsSealant, clamps -
Cut the roof fan opening and dry-fit before sealing.
ToolsJigsaw, sealant -
Add trim rings once everything is cured and leak-tested with a hose.
- Option Ford Transit Pill Window Cut Template Paper PatternOnly if you're cutting the opening yourself rather than using a window kit's own template.$89.00
- Option Ford Transit Awning Window Trim Ring$150.00
- Option Ford Transit Rear Half-Slider Window Trim Ring$150.00
Fan and Air Conditioning
The roof fan and any rooftop or split A/C go in while the roof is still bare and you can reach both sides of the metal. Air is what makes a van livable — a fan moves moisture out every night of the year, and A/C is what lets you sleep in it in July.

Never cut a roof bow. The fan and A/C openings go between the ribs, and the flange gets butyl tape plus a self-levelling lap sealant — not silicone. Silicone cracks and lets water in, and you won't find the leak until it has soaked your insulation.
-
Confirm fan and A/C positions between the roof bows, clear of the rack feet and solar.
ToolsTape, marker -
Fit the fan adapter or flange and bed it in butyl tape.
ToolsButyl tape, driver -
Seal the exterior with self-levelling lap sealant and let it cure.
ToolsLap sealant -
Mount rooftop A/C to its frame, or route the line set if it's a split unit.
ToolsSocket set -
Pull power to both units now, while the ceiling is open.
ToolsLoom, fish tape -
Leak-test with a hose before any insulation goes up.
Sound Deadening
Constrained-layer damping on the large flat panels kills the drum effect. You are not trying to cover the van — roughly a quarter to a third coverage on the big unsupported areas does almost all the work.


Full coverage is wasted weight and money. Tap each panel with a knuckle and treat the ones that ring, not the ones that thud.
-
Clean panels with isopropyl so the adhesive bites.
ToolsIPA, rags -
Cut tiles and apply to the centre of large unsupported panels — doors, side walls, roof bays.
ToolsShears, roller -
Roll every tile down hard. Air under the foil means it isn't damping.
ToolsSeam roller -
Do the wheel wells and rear doors — the loudest two areas on a Transit.
- Amazon Kilmat sound deadening — our Amazon shopWe don't stock deadening. This is what we use — linked through our Amazon storefront. Off-site
Subfloor & Flooring
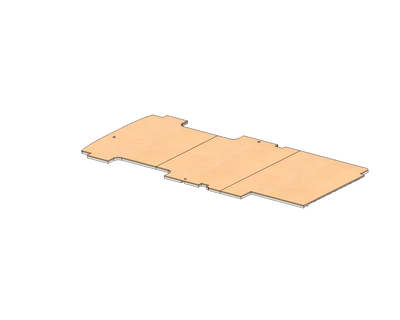
The floor goes in as one job: insulated subfloor, then the finish floor on top, then step and trim to close the edges. The subfloor is the datum for everything above it — cabinet heights, bed height, step height, and where the wall panels land all reference this plane. Our systems are cut to the Transit floor pan, so you're not scribing plywood to a corrugated deck.


Get it flat and level side to side before anything goes on top. A subfloor that rocks telegraphs into every cabinet door you hang for the rest of the build. Once the finish floor is down, cover it — you still have walls, trim and cabinetry to build on top of it.
-
Dry-fit the subfloor panels and confirm they sit flat with no rock.
ToolsLevel, straightedge -
Mark and cut any penetrations for wiring, plumbing, or undercarriage tanks before fastening.
ToolsHole saw, jigsaw -
Fasten down using factory threaded points where possible rather than drilling new holes.
ToolsDriver, hardware -
Add L-track now if you want floor tie-downs — it has to go in before the finish floor.
ToolsDriver -
Let the vinyl acclimate flat in the van overnight before you lay it. Laid cold, it will relax and move on you later.
-
Dry-fit the finish floor and check the cutouts land on your L-track and floor penetrations.
-
Adhere from the centre out, working air toward the edges.
ToolsAdhesive, roller -
Fit step and trim at the slider and rear to close the edges.
ToolsDriver -
Cover the finished floor with hardboard or ram board for the rest of the build.
ToolsFloor protection
- Core Ford Transit Premium Synthetic Subfloor SystemInsulated — no separate floor insulation needed.$2,375.00
- Core Ford Transit Insulated Baltic Birch Subfloor SystemInsulated — no separate floor insulation needed.$2,475.00
- Core Ford Transit Floor Step and Trim$700.00
- Core Ford Transit Lonseal Vinyl Pre-Cut Flooring 148$1,050.00
- Core Ford Transit 2Tec2 Pre-Cut Flooring 148$1,300.00
- Core Ford Transit 2Tec2 Pre-Cut Flooring 148 Extended$1,600.00
- Core EXT Transit Lonseal Vinyl Pre-Cut Flooring 148 Extended$1,150.00
- Option Ford Transit Rear Floor Trim$175.00
- Option AVC RIG Floor L-Track$215.00
Insulation
Walls, ceiling, and cavities get filled. In a metal box that swings 60°F in a day, the goal is continuous coverage with as few thermal bridges as you can manage — and no trapped moisture.


Do not stuff insulation into the lower door cavities or any channel with a factory drain. Those drains exist because water gets in. Block them and you build a rust incubator.
-
Fill ribs and cavities first, lightly — compressed insulation loses most of its value.
ToolsScissors, spray adhesive -
Cover the large wall and ceiling areas, working around your window and fan openings.
ToolsAdhesive, tape -
Leave factory drain paths and wiring channels clear.
-
Insulate the floor cavity before the subfloor goes down.
ToolsKnife, straightedge -
Check your window and fan flanges are still accessible before you close anything in.
- Core 3M Thinsulate by the Foot$11.95
- Option Ford Transit Floor Insulation Only$800.00
Electrical Rough-In
Every wire that will ever live behind a wall goes in now: battery, inverter, solar, 12V runs, the charge line from the alternator, and every switch leg. Running it while the insulation is still open means you can see every cavity you are feeding, and floor-level runs can drop before the subfloor covers them.


Pull more than you think you need and leave service loops. Adding one circuit after the wall panels are upholstered means taking a wall back off, and the panel never sits quite the same twice.
-
Set the location of the power system and confirm ventilation and service access.
ToolsTape, marker -
Run all cable in loom through furring channels, away from sharp edges and heat.
ToolsLoom, fish tape -
Grommet every pass-through and every hole in metal. No exceptions.
ToolsGrommets, deburr tool -
Label both ends of every run before it disappears.
ToolsLabel printer -
Drop any floor-level runs now — the subfloor goes down next and covers them.
ToolsLoom, fish tape -
Mount solar brackets and run the roof penetration with a proper gland.
ToolsSealant, driver -
Energise and test each circuit before any panel covers it.
ToolsMultimeter
- Option Flush Mount Solar Panel Bracket 4 Pack$100.00
- Amazon Prewire supplies — our Amazon shopWire, loom, grommets, lugs and terminals. A dedicated prewire list is coming to this storefront. Off-site
Furring & Framing
Furring gives the wall and ceiling panels something to land on, at a consistent depth, without you fabricating brackets. Aluminum keeps the weight down and won't rot if condensation ever finds it.
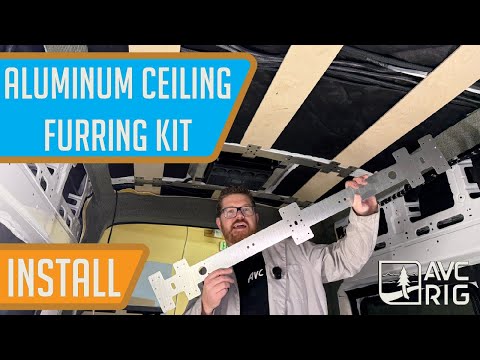
Every furring run is also a future mounting point. Photograph the layout with a tape in frame before the panels cover it — you will want to know where to drive a screw for a shelf six months from now.
-
Mount wall furring to the factory threaded points, checking depth as you go.
ToolsDriver, tape -
Run ceiling furring, keeping it parallel and consistent — panel seams will show any drift.
ToolsLevel, driver -
Add the wall-to-ceiling supports where the two planes meet to kill ripple at the joint.
-
Add furring around the A/C or fan opening if you're running rooftop air.
ToolsDriver -
Photograph the full layout with a tape measure visible in frame.
- Core AVC RIG Ford Transit Van Furring Kit$225.00
- Core Ford Transit Aluminum Ceiling Furring Kit$362.00
- Core Ford Transit Furring Bundle$843.00
- Core Ford Transit Wall to Ceiling Support$100.00
- Option Ford Transit Air Conditioner Aluminum Furring Kit$197.00
Trim & Upholstery
The front compound curve and the styrofoam blobs at the B pillars are the hardest shapes in the van to finish by hand. Setting the trim before the panels gives the wall and ceiling kits a finished edge to land against, instead of you scribing panels to a curve.


Dry-fit the trim and the wall panels together before you fasten anything down. The trim sets the reveal the panels butt into, so a piece sitting proud pushes every panel behind it out of line.
-
Fit the front trim kit to close the compound curve at the bulkhead.
ToolsDriver -
Cover the B pillar blobs.
ToolsDriver, adhesive -
Fit rear and D-pillar trim at the door thresholds.
ToolsDriver -
Add the bulkhead piece if you're separating the cab.
ToolsDriver
- Core Ford Transit High Roof Full Interior Trim Kit$1,250.00
- Core Ford Transit High Roof Front Trim Kit$800.00
- Core AVC Rig Ford Transit Full Interior Trim Kit$890.00
- Option Ford Transit High Roof Rear Trim Kit$500.00
- Option Ford Transit High Roof B Pillar Blob Covers$390.00
- Option Ford Transit Bulkhead Piece$425.00
- Option Ford Transit Mid Roof B Pillar Blob Covers$390.00
Walls & Ceiling
The moment it stops looking like a cargo van. Our kits are CNC cut to the Transit shell, so the panels drop onto the furring you already set instead of you scribing plywood to a curve for a week.

Dry-fit the whole kit before you upholster or fasten anything permanently. Confirm every rough-in is where you think it is, and that your window openings line up with the panel cutouts.
-
Dry-fit every panel, working ceiling first, then upper walls, then lower.
ToolsClamps -
Confirm cutouts land on your windows, outlets, and switch locations.
-
Upholster panels off the van on a clean flat surface — contact adhesive, worked from the centre out.
ToolsContact adhesive, roller -
Hang the ceiling first so the wall panels can support its edges.
ToolsDriver -
Fit wall panels, then the wall-to-ceiling supports to close the joint.
-
Stand back and look down the length of the van for ripple before final fastening.
-
Hang the headliner shelf and curtain rod once the ceiling panel is home.
ToolsDriver, level
- Core Ford Transit High Roof 148 Wood Wall Kit$2,700.00
- Core Ford Transit High Roof 148 Felt Wall Kit$3,745.00
- Core Ford Transit Medium Roof 148 Wood Wall Kit$2,550.00
- Core Ford Transit Medium Roof 148 Felt Wall Kit$3,545.00
- Core Ford Transit 148 EXT Wood Wall Kit$2,950.00
- Core Ford Transit 148 EXT Felt Wall Kit$4,445.00
- Option Ford Transit 148 Crew Wall Kit$2,000.00
- Option Wall Upholstery Kit : Byrne Tweed$800.00
- Option Byrne Tweed Upholstery Fabric by the Yard$25.00
- Option 1/8" Landau Upholstery Foam by the Yard$13.50
- Option Ford Transit Headliner Shelf & Curtain Rod$299.95
- Option Ford Transit High Roof 148 Wood Wall Kit for Go Code Trim$2,700.00
- Option Ford Transit High Roof 148 Felt Wall Kit For Go Code Trim$3,745.00
- Option Ford Transit 148 EXT Wood Wall Kit For Go Code Trim$2,950.00
- Option Ford Transit 148 EXT Felt Wall Kit For Go Code Trim$4,445.00
Take a Rest Phase
Walls are up, the rough-in is done, and nothing is permanent yet. This is the best moment in the whole build to stop and use the van — throw a mattress on the floor, go somewhere for a weekend, and live with the empty shell before you commit to cabinets.


Pay attention to how you actually use the space. Where you reach for a light, where you sit to put shoes on, where the condensation shows up in the morning. Every one of those notes is free now and a rebuild later.
-
Sleep in it — at least one night, mattress on the floor.
-
Note where you reach for light, power and storage. Adjust the cabinet plan to match.
-
Check every window, fan and penetration after rain or a hose test.
-
Re-torque seat bases, rack feet and anything you bolted to the body.
ToolsTorque wrench -
Clean out, inventory parts, and order what's missing for the next phases.
- Option AVC RIG Classic Logo Tee - Blackout Edition$26.00
- Option AVC RIG "Real American Van Builds" Tee - Dark Camo Edition$23.00
- Option Building block vanlife tee$26.11
- Option Comic Hero Unisex Jersey Tee - Super Hero Protector Team Up AVC Rig Theme$23.00
- Option Safari Van T-Shirt$23.00
Cabinetry & Build-Out
The longest phase by a wide margin. Unistrut gives you a structural rail to hang cabinets from without hunting for studs that don't exist, and the aluminum cabinet line bolts to it.

Mount to structure, never to wall panel. A cabinet full of tinned food that pulls off an upholstered panel at highway speed is the single most dangerous thing in an amateur build.
-
Mount unistrut runs to the van structure at your cabinet heights.
ToolsDriver, level -
Cap the unistrut edges — the raw channel is sharp.
ToolsTrim cap -
Hang upper cabinets first, while you still have floor space to work in.
ToolsDriver, clamps -
Set the galley run: sink, fridge, pantry, drawers. Level as a set, not one at a time.
ToolsLevel, clamps -
Build the bed or sleeper platform and check your door swings.
ToolsDriver -
Connect plumbing and electrical to the fixtures and test everything.
-
Fit swivel seats and table mounts last, once the aisle is clear.
ToolsSocket set
- Core Ford Transit Precut and Drilled Unistrut for Mounting Cabinetry$100.00
- Core Unistrut Trim Cap$25.00
- Option Aluminum Sink Cabinet$1,650.00
- Option Aluminum Fridge Cabinet$1,500.00
- Option Aluminum Overhead Cabinet$2,775.00
- Option Aluminum Pantry Cabinet$1,600.00
- Option Aluminum Drawer Cabinet$2,687.00
- Option Aluminum EcoFlow Utility Cabinet$2,645.00
- Option Ford Transit Innie Sleeper Pair$450.00
- Option Ford Transit B-Pillar Lagun Table Mount$49.00
- Option MobiFrame Single Swivel Seat - 2015+ Ford Transit - Driver Side$350.00
Power System
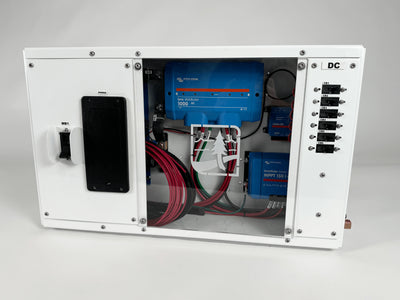
The wiring went in during rough-in. Now the system it feeds goes in — battery, inverter, charger, alternator charging and solar — mounted in the cabinet you built for it. Commission it one circuit at a time so a fault shows up on the circuit that caused it.


Fuse every positive as close to its source as you can, and size cable for both current and run length — an undersized cable is a heater. Lithium batteries can't charge below freezing unless they're heated, so mount them inside the insulated envelope, not under the van.
-
Mount the power unit and battery in their cabinet with ventilation and service access.
ToolsDriver, level -
Land the main battery cables and fit the main fuse and disconnect.
ToolsCrimper, torque wrench -
Connect alternator charging through the DC-DC charger or the kit's alternator input.
ToolsCrimper -
Wire the solar input and check polarity before connecting.
ToolsMultimeter -
Connect the shore power inlet.
ToolsDriver -
Bring circuits up one at a time and check every fuse and connection under load.
ToolsMultimeter, clamp meter -
Label the panel so anyone can kill power in an emergency.
ToolsLabel printer
- Core EcoFlow 5 kVA Power Kit$8,246.00
- Core 3.6 kW EcoFlow Power Kit - 5 kWh$7,239.00
- Option Aluminum EcoFlow Utility Cabinet$2,645.00
Plumbing Rough-In
Tanks, pump and the runs that feed the galley go in once the cabinets are set, so every fitting lands where the fixtures actually ended up rather than where the drawing said they would. Undercarriage and wheel-well tanks mount from below, so they stay reachable throughout.


Pressure-test the whole system and leave it under pressure overnight before you close any cabinet face over a fitting. A weeping joint you can reach is a ten-minute fix; the same joint behind a finished cabinet is a weekend.
-
Mount tanks and confirm fill, vent and drain routing clears the cabinet runs.
ToolsDriver, straps -
Mount the pump on a bracket with isolation — hard-mounted pumps transmit noise through the whole van.
ToolsBracket, driver -
Run supply and drain lines, supported every couple of feet so nothing sags or chafes.
ToolsClips, cutter -
Pressure-test and leave it overnight. Check every joint in the morning.
-
Insulate any line that runs where it could freeze.
- Core 24-Gallon Ford Transit Wheel Well Water Tank - Left (TR-L-24)$299.00
- Core 16-Gallon Transit Undercarriage Water Tank (TR-UC-16)$299.00
- Core Ford Transit Under Mount Water Pump Bracket$286.00
- Option DOMETIC Recon 360 Faucet$129.99
- Option Tetravan Folding Shower 2.1 with Magnetic Curtain$2,050.00
Heating
A gasoline heater tapping the main tank is the setup we install most. The fuel pickup, exhaust routing, and combustion air all have to be done properly, and all of it wants to happen before the interior closes up.

Exhaust routing is a safety item, not a fitment item. It must exit clear of any opening, be supported so it cannot contact anything combustible, and never be shortened below the manufacturer's minimum length.
-
Confirm heater location, then check exhaust and intake routing all the way out before drilling.
ToolsTape, marker -
Install the fuel pickup per the manufacturer's procedure.
ToolsManufacturer kit -
Mount the unit, route combustion air in and exhaust out, supported at spec intervals.
ToolsClamps, driver -
Fit the seat base trim to close out the install cleanly.
ToolsDriver -
Commission the heater and run a full cycle before anything covers it.
ToolsCO monitor
- Core Espar AS3 B2L 12V Heater- Full Kit (Gasoline)$1,819.01
- Core Ford Transit Seat Base Heater Trim$175.00
Finishing
Door storage, window covers, the privacy curtain and bug screens. None of it is structural — all of it is what you notice every single day you use the van.

Cut the window covers to the actual openings, not just the pattern, and label each one to its window as you go. They all look the same at six in the morning in a dark parking lot.
-
Fit rear and slider door storage panels.
ToolsDriver -
Cut and fit window covers, labelling each one to its window.
ToolsMarker -
Hang the privacy curtain behind the cab.
ToolsDriver -
Fit bug screens at the slider and rear.
ToolsDriver
- Option Ford Transit Upper Rear Door Storage Panels (Pair)$69.95
- Option Ford Transit Lower Sliding Door Storage Panel
- Option Ford Transit Stealth Front Door Window Covers (Pair)$99.95
- Option Ford Transit Insulated Privacy Curtain$179.95
- Option Ford Transit Bug Screen - Sliding Door$159.95
Exterior
Roof rack, ladder, side steps, awning and lighting. The exterior is what lets you carry gear and get to it — and it goes on last so nothing gets scratched while you're still working inside.


Everything on the roof changes your clearance height and adds weight up high. Measure the finished van, put the number where the driver sees it, and torque-check every exterior fastener after the first few hundred miles.
-
Mount the roof rack to the factory roof points, sealing every fastener.
ToolsSocket set, sealant, ladder -
Fit the rear or side ladder.
ToolsSocket set -
Mount the side steps.
ToolsSocket set -
Mount the awning and any exterior lighting; run the wiring through sealed glands.
ToolsDriver, sealant -
Move the solar panels to the rack if they aren't on brackets.
-
Measure and post the finished clearance height in the cab.
ToolsTape -
Torque-check everything after the first 300–500 miles.
ToolsTorque wrench
- Option Ford Transit Roof Rack : High Roof 148$1,700.00
Your build list
Items with options open on their product page so you can choose.
