


Ford Transit Aluminum Ceiling Furring Kit
- Designed and built by AVC RIG in Loveland, Colorado
- Not sure it fits? Call us at 970-399-9005
- Want it installed? Find one of our 100+ builder partners
This low-profile aluminum ceiling furring kit gives your Ford Transit ceiling the structural support it needs with lasting durability. It is made from .063 inch aluminum, so it will not rust or corrode, and you can install it with screws, rivets or adhesive.
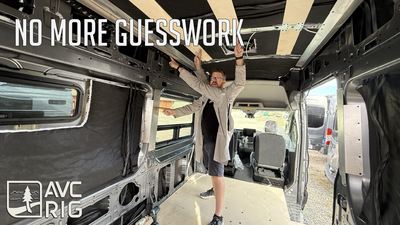
See our installation video HERE.
What Is in the Aluminum Ceiling Furring Kit
- Rear trim piece: runs along the D-pillar and lines up with factory holes for precise placement. Not included with the GoCode Trim version.
- Furring brackets: one per roof rib, 5 for EXT models and 4 for LB models.
- Optional pre-cut Baltic birch strips: choose "Yes" to include them, or cut your own.
- GoCode Trim version: if you are using the GoCode trim kit, choose "Yes Trim." This version comes without the rear trim piece that runs along the D-pillar, to make room for the GoCode trim.
Strip Sizes and Cut List
The brackets hold .25 inch strips. If you cut your own, all strips are 6 inches wide, with 3 of each length below.
- EXT: 26, 36, 17.25, 13 and 21 inches.
- LB: 26, 36, 17.25 and 9 inches.
Note: thicker material may need mitered ends or measurement changes for a proper fit.
How to Install the Ceiling Furring
Start at the rear with the trim piece, using the factory holes to set its position. If you have the GoCode Trim version, there is no rear trim piece because the GoCode trim goes there instead, so start with the brackets. Next, fasten one bracket to each roof rib. Slide your .25 inch strips into the brackets, working from front to back. Check that the strips sit flat and even before you add your ceiling panel. Plan lights, fans and wiring first, so you can route them between the strips. The install video above shows each step on a real Transit.
Complete Your Ceiling
Pair the ceiling kit with our Ford Transit Van Furring Kit for the walls and Wall to Ceiling Supports. Then add a ceiling panel from our wall and ceiling kits, or see all van furring kits. A flat, even ceiling makes panel seams line up and keeps lights and fans level. Every aluminum ceiling furring kit is designed in our Loveland, Colorado shop.
Ford Transit Aluminum Ceiling Furring Kit options
- Brand: AVC RIG
- Van Length: 148lb or 148ext
- Include Pre-Cut Birch: Yes or No (Cut It Yourself)
- For GoCode Trim: Yes Trim or No Trim
- Built for: Ford Transit
Buying the Ford Transit Aluminum Ceiling Furring Kit from AVC RIG
AVC RIG is a van conversion shop in Loveland, Colorado. Not sure the Ford Transit Aluminum Ceiling Furring Kit fits your build? Call us at 970-399-9005 or send us a message. Want it installed? Find an AVC builder near you. Planning the rest of your van? See our Ford Transit build guide, or browse more van conversion parts.


